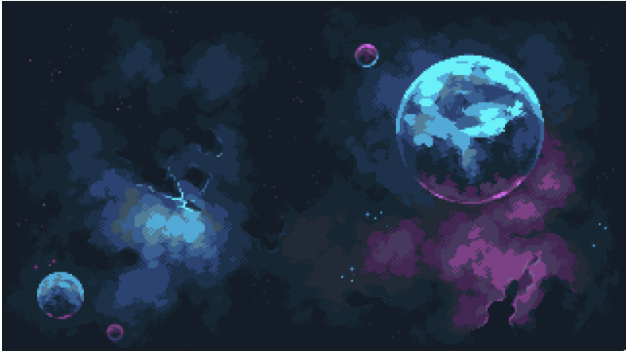
The picture above is of the background that we will be using throughout the project. For simplicity, we will be calling the file that we are storing this in bg.png, and the variable associated with it kBg, such that
this.kBg = “assets/bg.png”; // Save all your images in the assets folder associated with your project.
This picture above is of the projectile's trail that we will be using throughout the project. For simplicity, we will be calling the file that we are storing this in bullet_trail.png, and the variable associated with it kT, such that
this.kTrail = “assets/bullet_trail.png”;
This picture above is of the projectile's trail that we will be using throughout the project. For simplicity, we will be calling the file that we are storing this in missile.png, and the variable associated with it kMissile, such that
this.kMissile = “assets/missile.png”;
engine.texture.load(this.kBg);NOTE: To call the functions above, you must have also imported engine from “../engine/index.js”. This should be done automatically, but in case it is not, please write at the top of the file (underneath the “use strict”;) the following line of code:
engine.texture.load(this.kT);
engine.texture.load(this.kMissile);
import engine from “../engine/index.js”;
In either case, you will need to import the Projectile class. This can be done with the following line of code:
import Projectile from "../engine/game_objects/projectile.js"
- Projectiles with Trails Assuming everything has loaded correctly and you have been keeping up with the tutorial to this point, you can initialize the Projectile object with the following line of code:
- Projectiles without Trails The projectiles without trails are very similar to the projectiles with trails. The only thing that is different is the fact that the constructor takes in less parameters. The new method call would look like this:
this.mProjectile = new Projectile(this.kMissile, Infinity, this.kTrail, 500, 10);As a reminder, the first parameter represents the projectile's renderable (which we defined earlier - in step 1), the second parameter represents the projectile's lifetime (in the example, we set it to be Infinity, but you can change it for how long you would like it to be), the third parameter represents the projectile's trail renderable (which we defined earlier - in step 1), the fourth parameter represents the projectile's trail's lifetime (in the example we set it to 500 milliseconds but you can change it for how long you would like it to be), and the final parameter is the trail interval, which is the duration (in milliseconds) between each trail's creation (we have set it to be 10 milliseconds but you can set it how you would like it to be).
This will in turn create a projectile object with the trail renderable!
this.mProjectile = new Projectile(this.kMissile, Infinity);As a reminder, the first parameter represents the projectile's renderable (which we defined earlier - in step 1), the second parameter represents the projectile's lifetime (in the example, we set it to be Infinity, but you can change it for how long you would like it to be).
- Straight Projectile Path Type The way for which we have straight projectiles set up at the moment, we will require 5 parameters as an input (some of which can be left null). The next three sections will cover how to call each use case of the straight projectile path type.
- Straight Target Projectile Path If you would like a projectile to go straight towards a target and not change its direction or deviate, this would be the function to call. To do this, let us take for example that we have an object, named this.kPortal set up. We would then call the straight target projectile path method, like this:
- Straight TargetPoint Projectile Path If you would like a projectile to go straight towards a point and not change its direction or deviate, this would be the function to call. To do this, we would call the function as follows:
- Straight TargetDirection Projectile Path If you would like a projectile to move towards a direction and not change that direction or deviat, this would be the function to call. To do this, we would call the function as follows:
- Tracking Projectile Path Type The way for which we have tracking projectiles set up at the moment, we will require 4 parameters as an input. The next two sections will cover how to call each use case of the tracking projectile path type.
- Tracking Game Object Projectile Path If the input for the first parameter is a game object, then the following type of tracking will occur. This type of tracking ensures that the game object will be followed until the projectile comes into contact with the game object. To do this, let us take for example that we have an object, named this.kPortal set up. We would then call the tracking projectile path method, like this:
- Parabolic Projectile Path Type
- Function 2 This would be a more physics based approach to the parabolic path type. In this function call, you would give it a direction, acceleration direction, and acceleration magnitude, and the function would calculate the path of the parabola based on the direction, speed, force direction, and force magnitude. An example of this would be the following:
this.mProjectile.setStraight(this.kPortal, null, null, 0.3, 0.01);This would, for reference, set the target to be the kPortal's location at the time of the call (i.e., if the kPortal moves, the projectile will not follow), it sets the target point to be null, target direction to be null, the speed of the projectile to be 0.3, and finally the acceleration of the projectile to be 0.01.
this.mProjectile.setStraight(null, vec2.fromValues(0, 1), null, 0.3, 0.01);This would, for reference, set the target to null, it sets the target point to be the vec2 value [0, 1] (i.e., the projectile will move towards the coordinate [0, 1]), target direction to be null, the speed of the projectile to be 0.3, and finally the acceleration of the projectile to be 0.01.
this.mProjectile.setStraight(null, null, vec2.fromValues(0, 1), 0.3, 0.01);This would, for reference, set the target to null, it sets the target point to be null, target direction to be the vec2 value [0, 1] (i.e., the projectile will move upward in the direction [0, 1]), the speed of the projectile to be 0.3, and finally the acceleration of the projectile to be 0.01.
Each of the following will take in a speed and acceleration variable which the projectile class will use to calculate the overall speed and acceleration of the projectile as it updates throughout the course of its lifetime.
this.mProjectile.setTracking(this.kPortal, Math.PI/2, 0.1, 0);This would, for reference, set the target to be the game object this.kPortal. It would also set the max rotation to be pi/2 (the max rotation, would in turn, prevent the projectile from turning more than it as the projectile tries to follow the game object). This would also set the object speed to be 0.1 and the acceleration to be 0.
this.mProjectile.setParabolic(vec2.fromValues(1, 1), 0.3, [0, 1], 4);This would, for reference, set the direction to be the vec2 value [1, 1] (i.e., the projectile will move diagonally in the direction [1, 1]) with a speed of 0.3, a force direction of [0, 1] and a force magnitude of 4 as well.
Furthermore, to create your own, personalized, unique projectile, you can extend the main projectile class to create multiple different types of projectiles that work in unison in your game.
- Drawing Projectile To draw the projectile, please use the write the following lines of code within my_game.js in the draw() function:
- Updating Projectile To update the projectile, please use the write the following lines of code within my_game.js in the update() function:
If you have multiple projectiles, it is beneficial to call Projectile.drawAllProjectiles() to draw all projectiles without the worry of losing track.
If you have multiple projectiles, it is beneficial to call Projectile.updateAllProjectiles() to update all projectiles without the worry of losing track.